.png?width=50&height=50&name=Untitled%20(50%20%C3%97%2050%20px).png "Remotely")
Company Profile Sign Up
Follow these steps to setup a Company Profile:
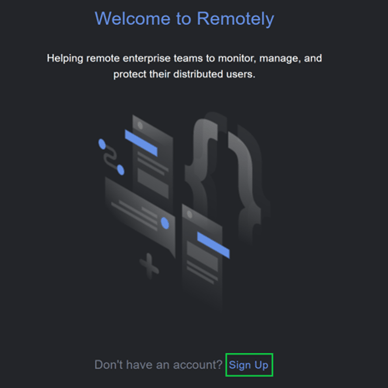
- Go to the Remotely Web Portal (Contact support for link to application)
- Click 'Sign Up' located on the left side of the screen
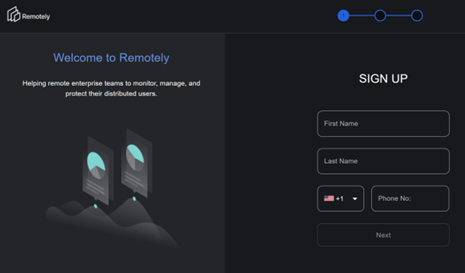
- Complete the profile registration providing the information requested
- Click 'Next'
- After clicking 'Next', you will see confirmation that the form has been submitted
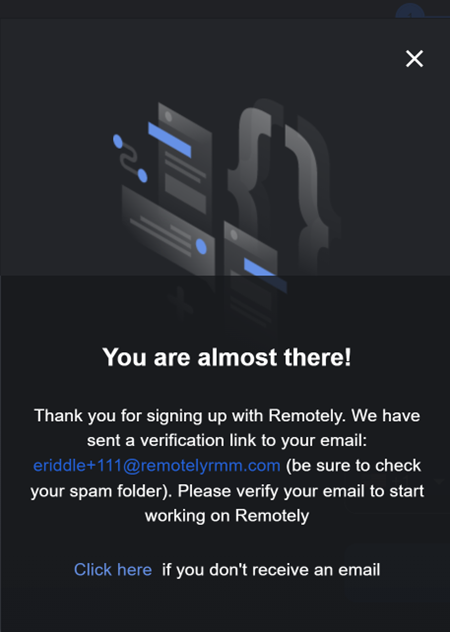
- In your email inbox, open the verification email and click 'Sign in to Remotely'
- You will be redirected to a login page and should log in using the username and password created during sign up

Azure Enterprise Application Configuration
Creating and configuring an Azure Enterprise Application requires access to Azure Active Directory. To learn more on how to create and configure an application, please visit Microsoft's Quick Start Guide.
Cloud Infrastructure Connection
At the login of the first Enterprise Admin, you will be presented with a screen guiding you to link to a Cloud Service.
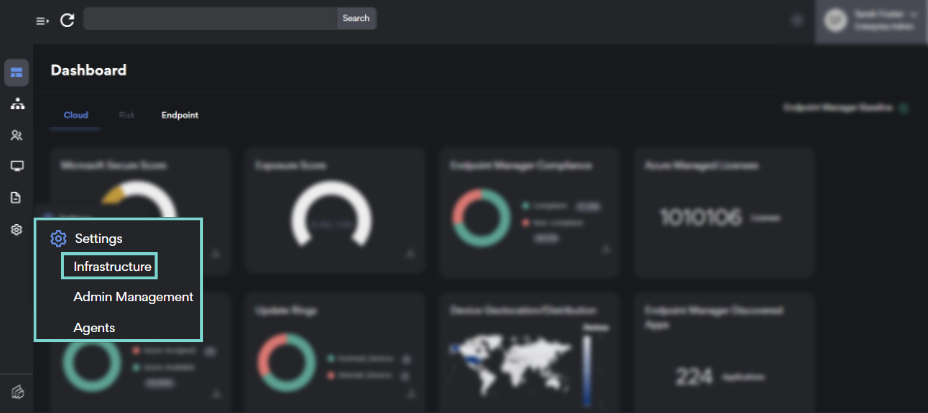
You can either click the link on the right pane or navigate to the left side menu, expand Settings, and select Infrastructure.
Once in the Infrastructure Settings screen you will see a button labeled “Add to my Enterprise”. This is an automated process built into the application that will create an enterprise application in your Azure tenant and assign to it the permissions listed earlier in this document.
Click on “Add to my Enterprise”. This will direct you to the Microsoft login screen where you can log in with your Microsoft account and grant Remotely access to the permissions listed earlier in this document.

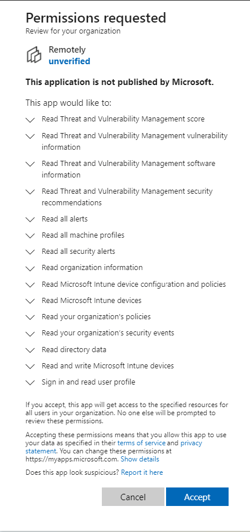
Once logged in, you will see prompt listing all the permissions needed to retrieve and display data in our application. If you want to grant access of the listed permissions to Remotely, you can click on Accept, otherwise you can click on Cancel.
Once you accept, you will be taken back to the application where you will be asked to wait while our application creates the enterprise app in your tenant and assigns the listed permissions.
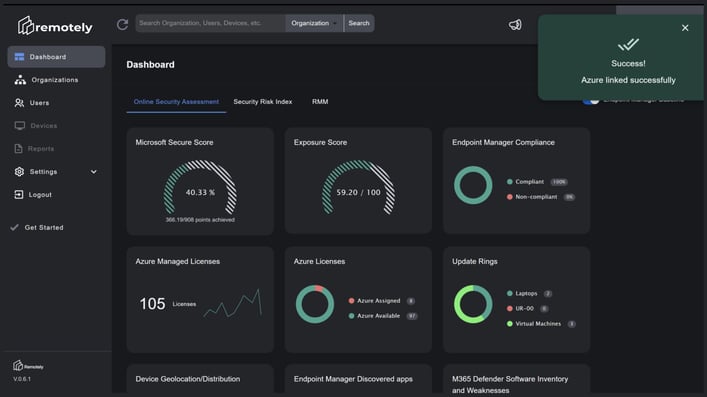
Once Successful, you will be redirected to the OSA dashboard which will begin to populate immediately.
Organization Sync
All Azure Groups will sync automatically within the application after the Azure connection is complete.
Admin Management
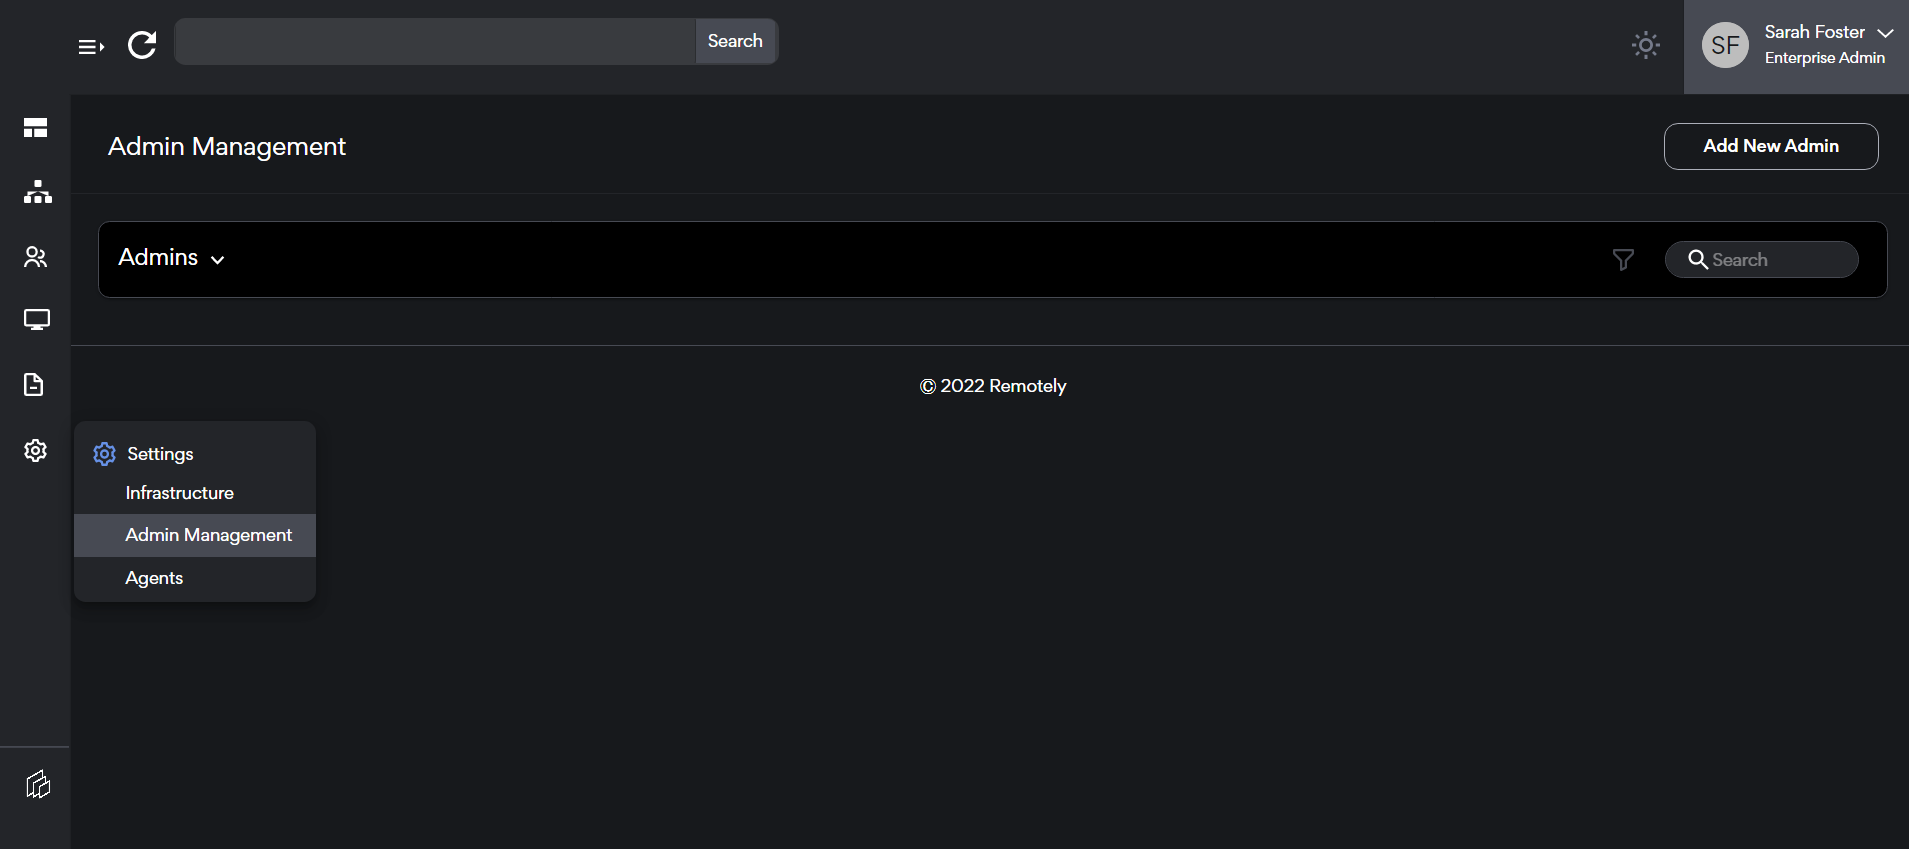
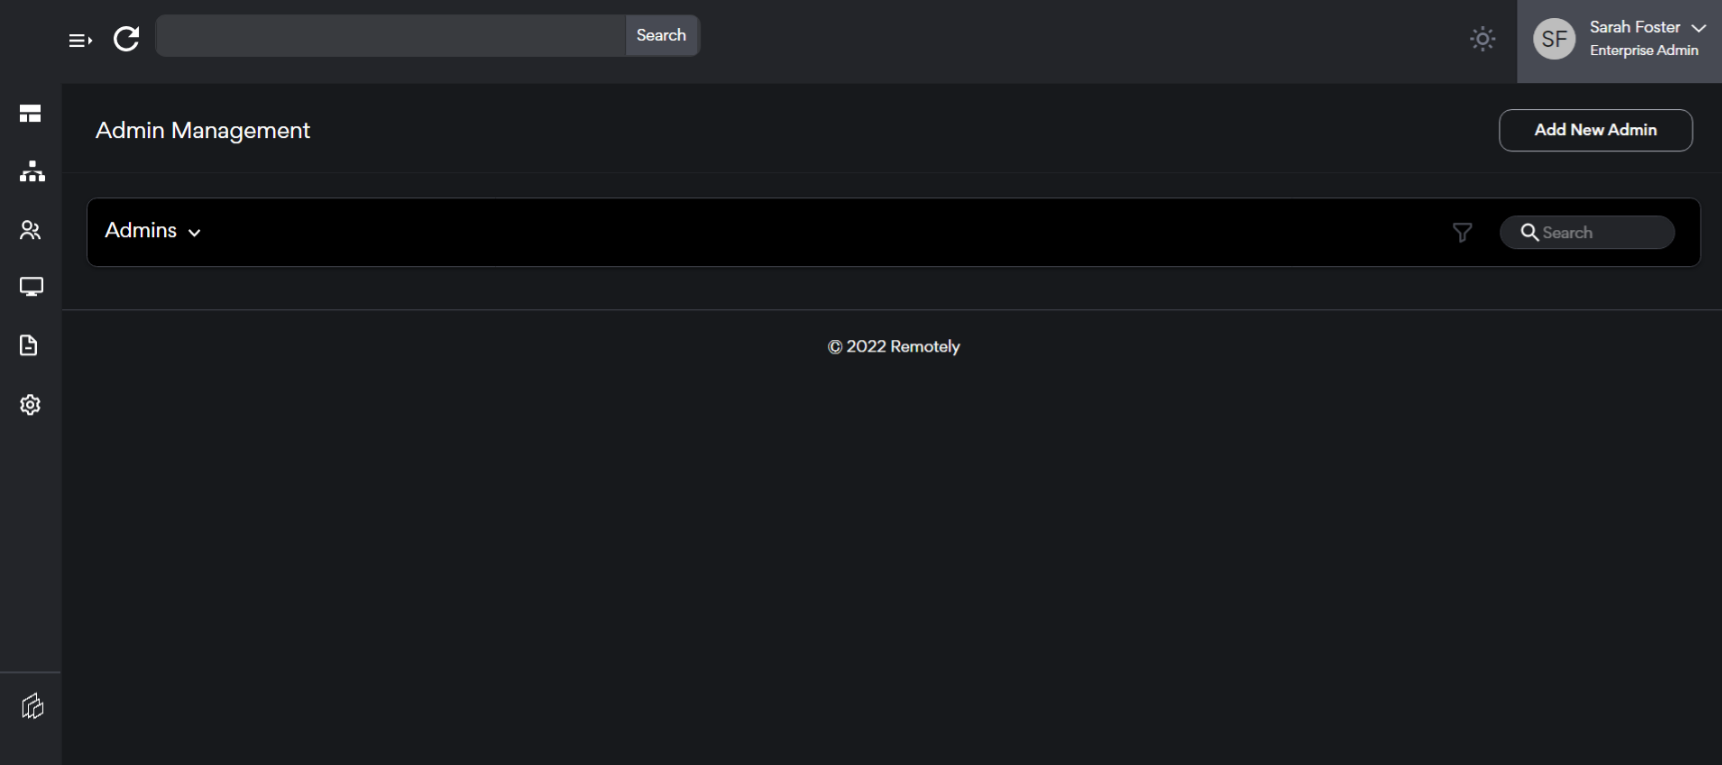
Remotely's Administrator Management settings can be accessed by navigating to Settings > Admin Management.
To add a new administrator:
- click on the Add New Administrator in the top-right corner.
- Complete the Add Admin form including a valid company email address.
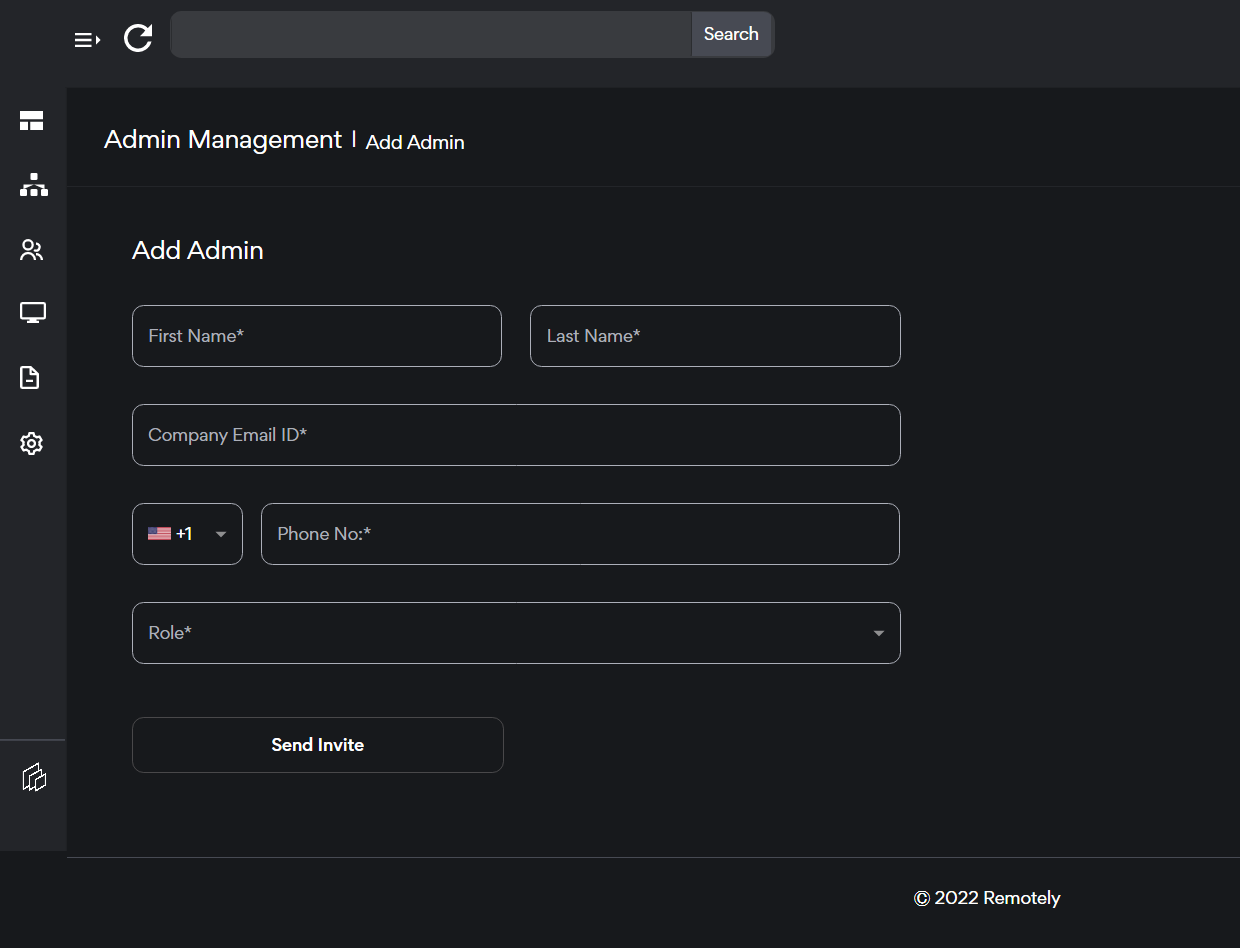
- When adding the admin, you have an option of Role that can be either Enterprise Admin or Organization Admin.
-
Enterprise Admins: Granted full visibility and management over all aspects of the application including adding additional administrators.
- Organization Admins: Granted limited visibility to only assigned organizations. Does not have full administrative rights such as updating Azure connection and can only add administrators to their Orgs.
-
- Select the 'Send Invite' button
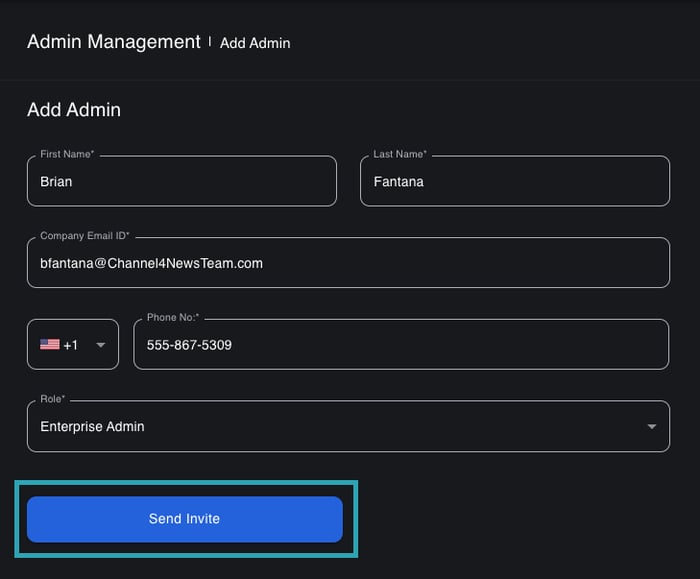
Once complete, the Admins table will update with the new administrator information.
Note: Clicking on an admin in the table brings up the editing options the administrator's information. Any update will require a re-verification email to be acknowledged by the admin.
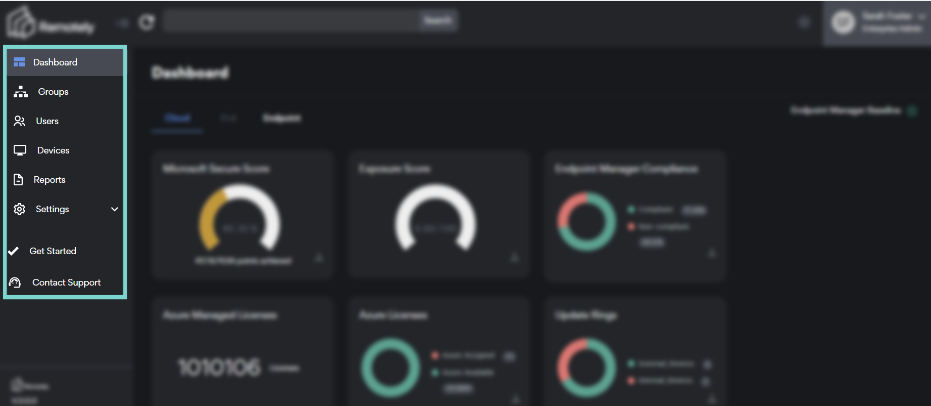
User Interface Overview
Navigation Menu
The left side menu is the main navigation hub allowing access to all views of the data within the application.
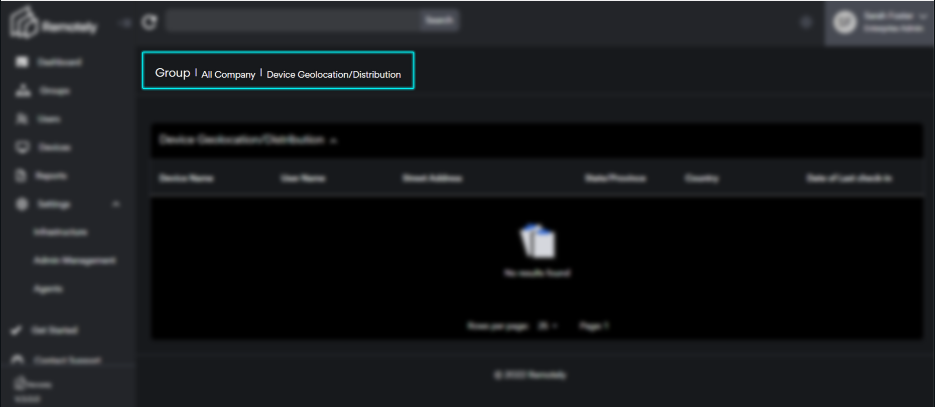
Breadcrumbs
With the Remotely service several datasets will allow for deeper inspection of the data. When this is utilized the top navigation will build a breadcrumb trail for you to easily navigate back.
Module Selection
The Remotely service is built with a modular dashboard design, each module of the application has a unique design that fulfills a specific function.
Data Pane
Each section of the Remotely service will display its data set in the data pane. Elements within this data pane can be manipulated or inspected depending on its context.

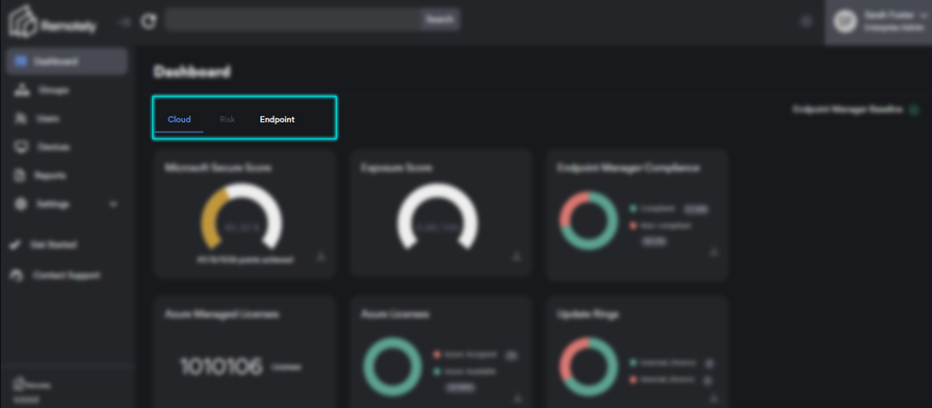
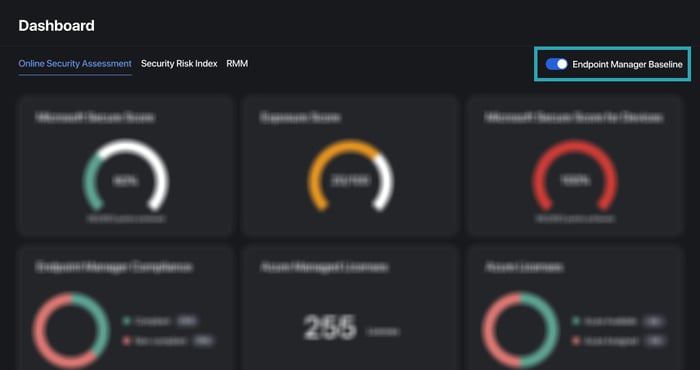
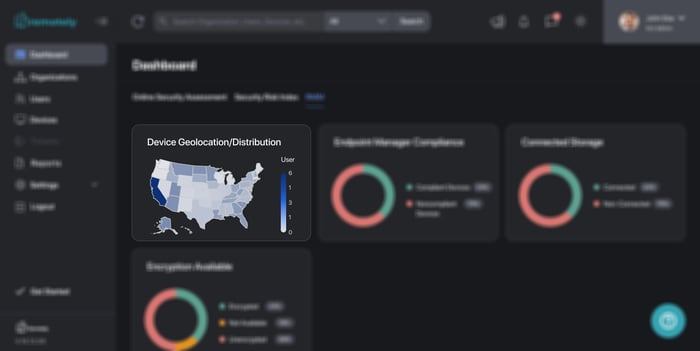
Dashboard Highlights
Dashboard Tiles
In the Enterprise Online Security Assessment (OSA) dashboard, there are several tiles with data points. At the top right you will see the Endpoint Manager Baseline. If a baseline has been configured for this tenant, the toggle will be enabled automatically.
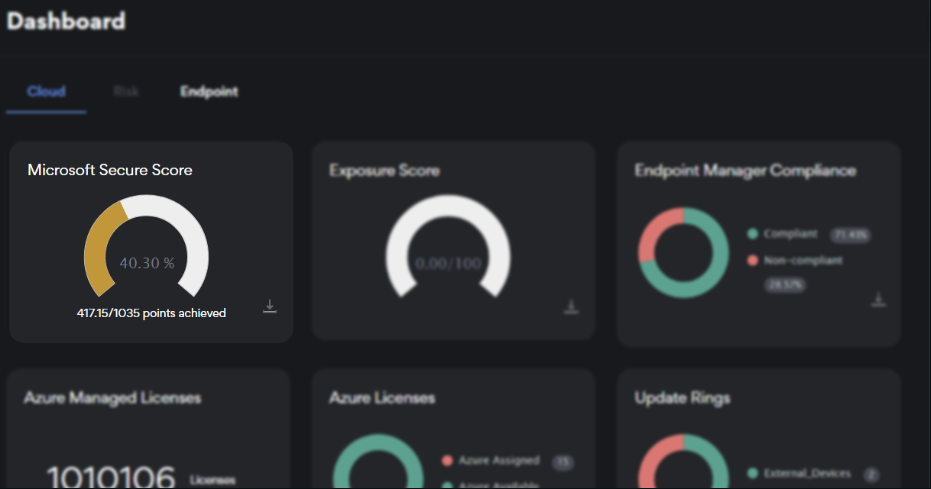
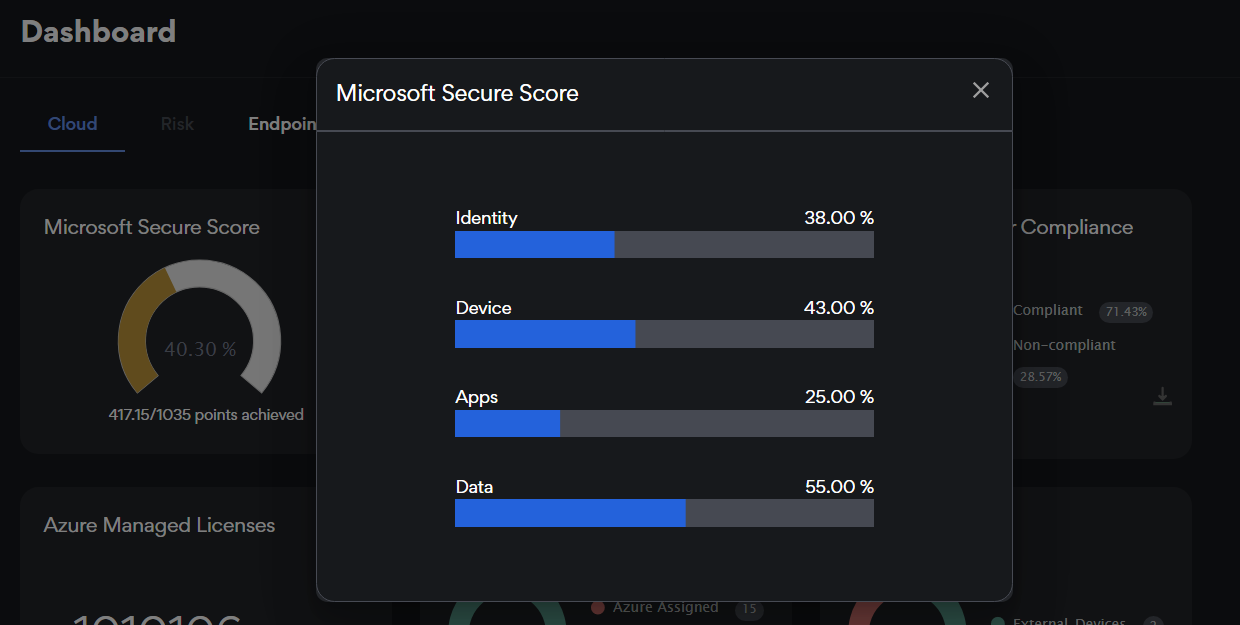
Microsoft Secure Score
Note: This tile is selectable for detailed score metrics including:
- Identity
- Device
- Apps
- Data
Learn more by visiting Microsoft's Documentation.
Microsoft Exposure Score
Microsoft’s Exposure score is a calculated metric from Microsoft that matches the Microsoft Security Score against the known threat actors and active attack vectors to determine vulnerability to exploitation.
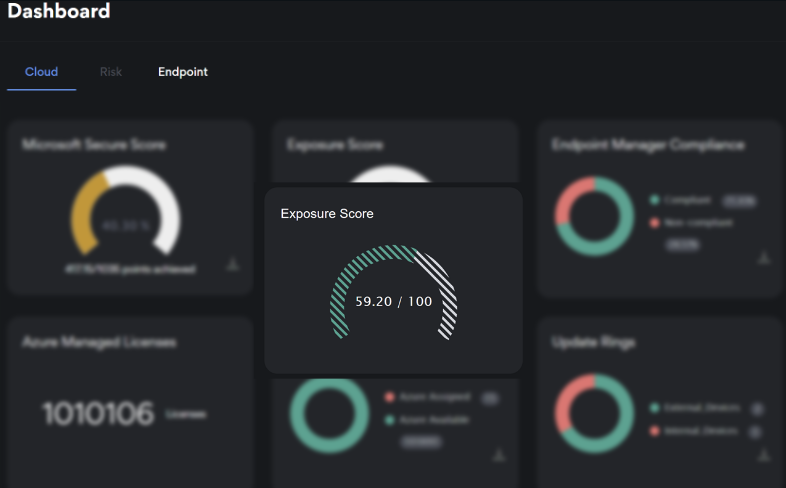
Learn more by visiting Microsoft's Documentation.
Endpoint Manager Compliance
This is the measurement of the distribution of devices within the company which are compliant with the defined Microsoft Endpoint Manager.
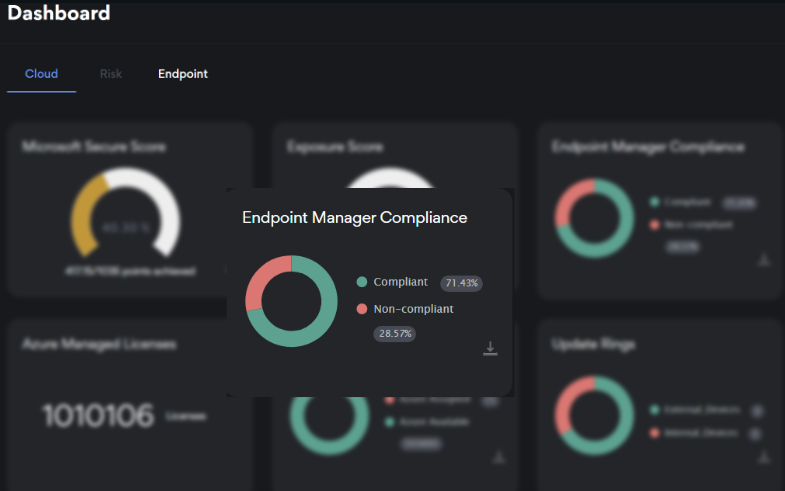
Learn more on how to create device compliance policies by visiting Microsoft's Documentation.
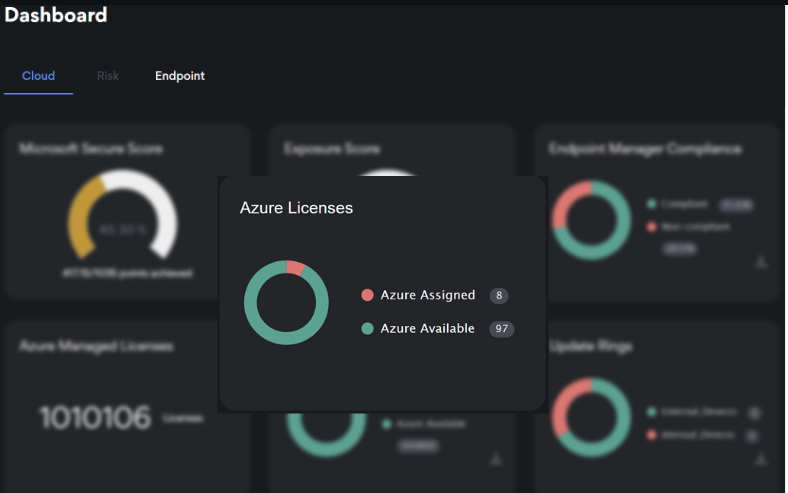
Azure Managed Licenses
This includes any licensing that is managed by the monitored Azure tenant. This includes not only Microsoft licensing but also all licensing registered to the Azure tenant including some purchased through Azure marketplace.

Azure License Assignment Tile
The Azure license graph displays the license allocation for Azure managed licenses showing the number of licenses that are available as well as the number that are currently assigned.
Microsoft Update Rings Assignments
Microsoft Update Rings are the configuration tool used within Azure to define the update and patch cadence for devices in Azure. This helps the organization understand the distribution policies around security, features, and quality-of-life updates from Microsoft.
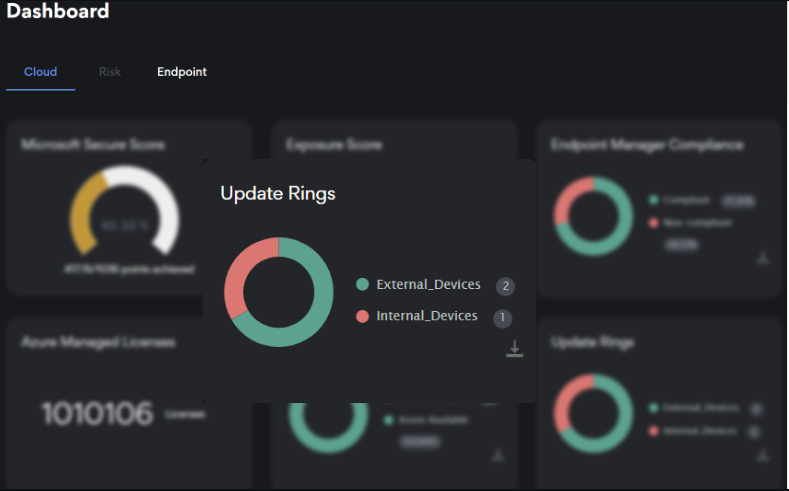
Learn more on how to create device compliance policies by visiting Microsoft's Documentation.
Geographic Distribution Information
Geographic distribution information is used to display the location of devices across organizations. Understanding device location is critical in informing administrators where users are located, or if devices have been compromised.
IMPORTANT: In version 0.6.1 the geographic data is currently not live data
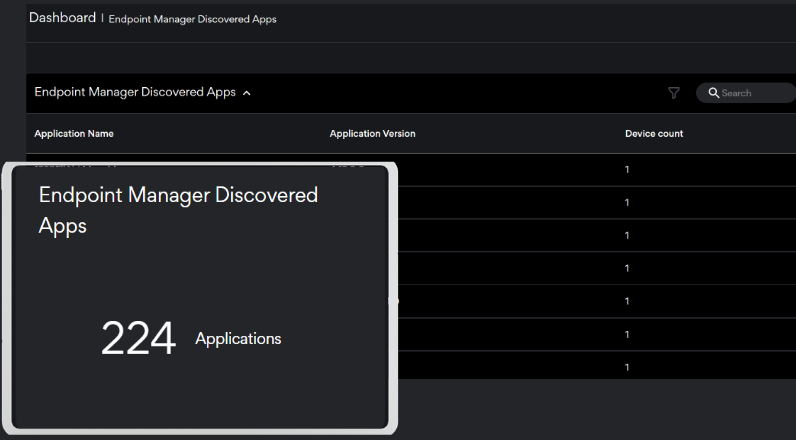
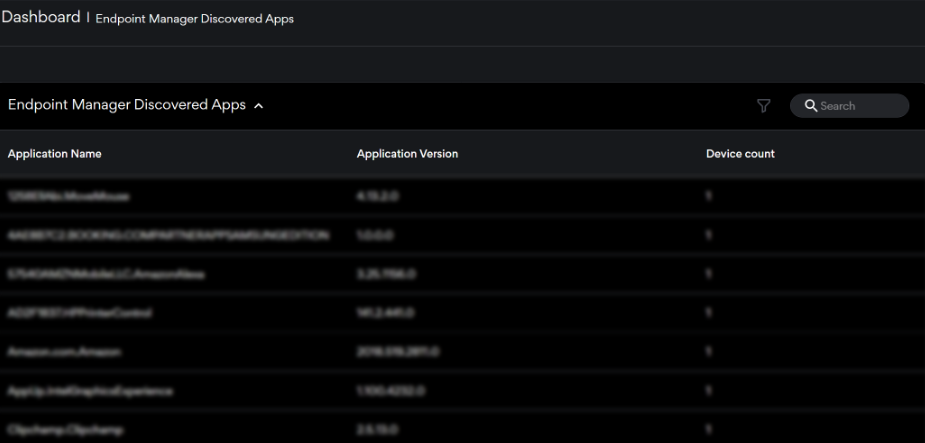
Endpoint Manager Discovered Applications
This tile is clickable for a list of the applications and the devices they have been found on.
This tile and subsequent screen show all applications and versions that have been found on devices within the Azure tenant.
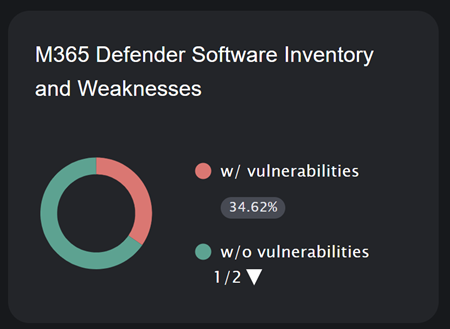
M365 Defender Software Inventory and Weaknesses
This tile shows the percentage of applications found within the software inventory that have documented vulnerabilities and weaknesses.
Advanced Navigation
The Remotely Service features several advanced navigation and data visualization controls to improve the user experience of the application.
Graph Customization
Each graph within the Remotely service can be tailored to show specific data models. This can be done by simply clicking on the data sets that you wish to hide which adjust the graph in real time.
Search
On tables with search enabled, you can search the relevant columns within a table to easily surface data.
Filtering
Within a filter enabled table, you can open the filter bar to select relevant field values to reduce the scope of data displayed.
